Fiber optic cables can transfer data at light speed. However, the connections may fail if the fiber optic cable is not properly terminated. Precise termination provides low signal loss and maximizes fiber optic cable performance. So it’s very important to understand how to terminate a fiber optic cable. This article will walk you through the steps of terminating fiber optic cable.
The terminating of fiber optic cable requires some fiber optic termination tools: Fiber Optic Cleaver makes a clean cut on the fiber for better splicing.Fiber Stripper removes protective covering from fibers.Polishing film provides a smooth finish on the fiber ends. The crimp tool secures connectors to fiber cable. Optical Power Meter assesses power loss to assure quality.Fiber optic connectors are essential for connecting devices or the cables.
A step-by-step guide to terminating a fiber optic cable
1. Preparation.
Before the fiber optic termination, the preparation includes creating a clean, stable workspace.
2. Strip the fiber.
Using a fiber stripper, carefully remove the cable’s outer jacket. Then, remove the buffer coating to show the bare fiber. Precision is the key here; if not, it results in damage and compromised performance.
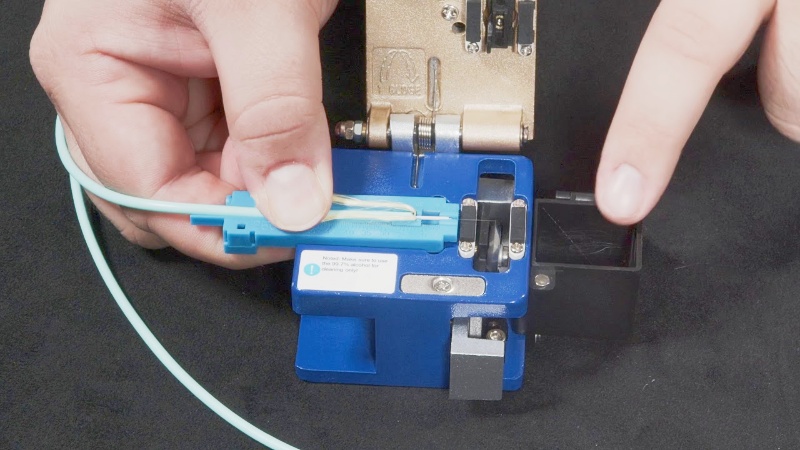
3. Cleave the fiber.
Next, insert the stripped fiber into the fiber optic cleaver. This step is to produce clean, precise ends. A poorly cleaved fiber can cause serious signal loss and failing fiber optic splicing.
4. Clean the fiber.
We should always clean the fiber with isopropyl alcohol and lint-free wipes before proceeding. This guarantees that no dust or oils block the connection.
5. Attach the connector.
Place the cleaved and cleaned optical fiber into the fiber optic cable connectors. Use the crimp tool to secure the connector in place. The closer the fit, the more efficient the connection.
6. Polish the fiber end.
Use the polishing film to polish the fiber’s end. This procedure eliminates any flaws that could scatter light and impair fiber optic cable performance. A well-polished end guarantees that data flows smoothly and uninterrupted.
7. Test the connection.
Finally, test the terminated optical fiber cable by using an optical power meter. This device is to measure the loss of signal. A successful termination should have low loss.
Here are some practical tips for fiber optic cable termination. Firstly, keep tools and materials organized. This not only accelerates the process but also minimizes errors. Secondly, handle fiber optic cables with care as they are fragile. Thirdly, avoid bending or using too much force during the termination process. Lastly, regular maintenance of fiber optic cables helps prevent difficulties and ensure optimal operation.
During your time of terminating fiber optic cables, there are some common mistakes we can avoid:
1. Improper Stripping: It can damage fibers and result in poor performance if we cut too deeply.
2. Skipping the Cleaning Step: Residual dust or oil can negatively influence the connection, leading to high signal loss.
3. Improper cleaving might result in inefficient splicing and connections.
When terminating a fiber optic cable, precision and attention to detail are essential. Each process, from stripping to cleaving to polishing, considerably improves the overall performance of your fiber optic network system.Mastering the art of terminating a fiber optic cable guarantees that your network performs optimally, and investing in the necessary tools and strategies will pay off in the long term. Please remember that in the world of fiber optics, precision is everything.